Watercolor Father’s Day Cards

Watercolor Father’s Day Cards

I used the Tombow Dual Brush Markers to make watercolor backgrounds for Father’s Day cards also.  The technique is the same but I used a zip top bag instead of the blending palette from Tombow so I had a larger area to color.

I’ve seen two different ways to add water to the ink so that the watercolor effect is created.  You can either add water to the paper then the ink scribbles or you can add the water to the ink and press to dry paper. I tried both ways in this project and I find it easier to wet the ink and press to dry paper.  If you happen to get ink on a dry part of the paper and want the ink to spread, just spritz the paper with water and it will spread around the paper.

So, its pretty simple to create a pretty unique effect with a few markers and a plastic bag.

Are you ready for Father’s Day?

Envelope Bookmark

Envelope Bookmark

Here’s my take on the upcycle, envelope bookmark using Tombow dual brush pens, blending palette and the mister I recently got in the mail!

I used the dual brush pens on the blending palette to get the watercolor effect.  I think I’m still a bit nervous of getting the colors close together because I don’t want to get my new markers mixed with other colors.  That is just me, I know they are designed to be blended and they are easy to clean back to their original color, but since these are brand new, I was being a bit over cautious.

I really like this idea for bookmarks because you can pick any old piece of junk mail, cut the corner off, add some decoration (or not) and you have a bookmark that you won’t be sad if it ends up staying with the book when you donate it to the thrift store!

Stay tuned tomorrow for another way I used these pens!

Paper paged book or e-reader?

Scrap Our Stash Design Team Call Out

Scrap Our Stash Design Team Call Out

In my browsing of the internet either via Pinterest or Instagram I found a chance to apply to become a design team member for Scrap Our Stash.  They are looking specifically for those people who are designing 12×12 pages.  While that isn’t something I do a whole lot of, I think I would be a great asset to the team because I would bring a different approach, coming from a more minimalist card making background.  I now a lot of scrapbookers and paper artists use a lot of embellishments and different elements on their pages, but that is where I am different.  I’m not agains using them, but I use them sparingly.  I don’t think the embellishment should detract from the focus of the page.

I found the design team call out a few days ago and the deadline is today.  So, I put together a couple pages as part of my submission for the design team.  I’m sure you’re wondering why I want to be part of a design team for a product I don’t typically produce.  The answer is that I want to challenge myself.  Being part of the design team would require me to step outside my comfort zone and regularly create something that will inspire others.

Here are my two pages I created for the Scrap Our Stash design team call out.

My husband is a runner and he keeps all his medals and bibs.  the medals get hung on a rack and the bibs get made into a scrapbook page.  I hadn’t gotten around to his most recent race, so this was just the push I needed.  It is interesting trying to scrapbook for an adult male than it is scrapbooking for anyone else, don’t you think?

Do you scrapbook different when the recipient is a man than if its a woman or child?

Scrapbook.com Sizzix Contest

Scrapbook.com Sizzix Contest

I love when I randomly come across contests that I can enter to win things I don’t have but desperately want.  Today I came across a Sizzix Ultimate Giveaway from Scrapbook.com.  5 people will win a $500 starter bundle.  I don’t have any kind of die cutting machine in my arsenal, so it would be a great addition.  I’ve been eBay stalking them, but if I could win one, all the better!

Click here to enter!

But, please don’t.  If you enter, that lowers my chance of winning.  Just kidding, you can win too…

Have a great holiday weekend and remember those who gave the ultimate sacrifice for the freedoms we enjoy today.


Drawing Houndstooth

Drawing Houndstooth

I’m working on Father’s Day cards and wanted to use houndstooth as the background.  I don’t have any paper with that pattern, so I thought I’d be able to draw some.  Here’s how it all went down:

I started out drawing a 1 inch grid on my paper.  I used a clear quilting ruler and did a poor job of making my lines perfect, as you can see.  But for this particular project, it will probably be just fine…

IMG_5405

After the grid is drawn, the solid color you’ll be using needs to be colored in every other square on every other line.  That is if your houndstooth only has 2 colors, the one you’re adding and the color of your paper.

IMG_2375
See, every other square on every other line.  Makes perfect sense now.

Once your squares are colored, nows time to color the pieces that make it look like the little froggies.  You will now be drawing diagonal lines starting at the empty square on the top row.  Each diagonal row that starts between two colored squares will be broken into 4 pieces.  A diagonal line from corner to corner and then another diagonal line dividing the half in half.

IMG_3760    IMG_9039

To make it easier to draw the half in half, on my ruler, I could line the diagonal line up with the 3/8 in mark and draw a line and it would be nearly perfect.

Next step is to start coloring the bow ties at the corner of the colored squares.  Followed by every other stripe in the marked squares.

IMG_0330   IMG_1383

Final step, erase all those lines and your pattern is complete!

IMG_6003


Infographic

Infographic

My final assignment in one of my design classes was to create an infographic.  I was given the information and had to present it visually.  I see al the great infographics online and find them very helpful and engaging.  They aren’t easy to put together, well I didn’t find it that simple.  It was a balance of finding a creative and attractive way to present the information as well as the spacing on the page.  I struggled with the spacing the most.

mckinney_infographic

What do you think? Be gentle, it was my first try!

Irojiten Adult Coloring Set

Irojiten Adult Coloring Set

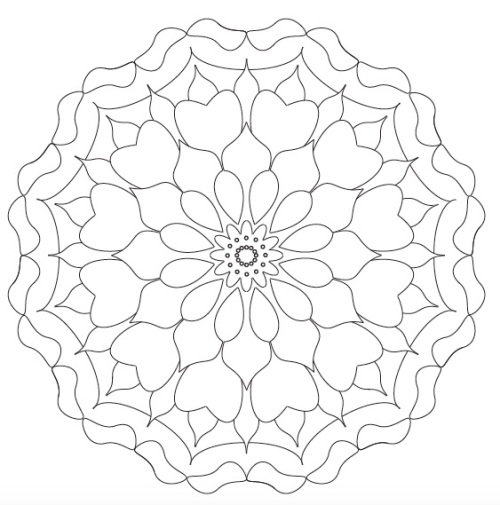
I haven’t quite jumped on the coloring bandwagon until recently.  I got a set of Irojiten colored pencils from Tombow.  I didn’t have an adult coloring book to give them a try with, I only have coloring books for my son and they aren’t really that inspiring.  Anyway, I’ve been seeing mandalas all around the internet and thought “I could make one of those and then use my new colored pencils to color it”.  I drew a circle and began to draw…

drawing

Yeah… so thats how that went… So, plan b… illustrator.  I made a few mandalas in illustrator, see that post here.

Once I picked my picture to color, I opened my new colored pencil set and they weren’t sharpened.  Not that that’s a problem, but so you know, you’ll have to sharpen 12 colored pencils.  The sharpener and a sand eraser are included, so you have everything you need.

IMG_0072

So, about these colored pencils.  They are amazing.  I was only familiar with the mass market colored pencils, Crayola and Rose Art, these are in a league way above those.  One of the things I loved about these pencils were that they were so smooth when coloring.  You know how a regular colored pencil sounds kind of scratchy when you’re coloring.  These don’t, they are so smooth and glide over the paper.  I also liked that the color is super rich and you can build upon them.  Sometimes when you’re coloring wth other colored pencils, the color you see is the color you get, layering and blending aren’t really an option.  These, you can layer and blend and give your coloring dimension.  You’ll notice in my picture that I colored, you can kind of see the pencil marks.  I think that probably has more to do with the paper than the pencils.  Next time I’m at the craft store (the nearest one is 1.5 hours away) I want to get a blending pencil to see if I can get those to smooth out.

IMG_0073

In this particular set, there is such a range of colors, and with layering and blending, you can color just about anything.  My favorite color has to be the surprise red because its not quite pink but not really red either, its very nice.

As you see, the set comes with an eraser and pencil sharpener.  A note about the eraser.  It is a life saver.  It is the Mono Sand Eraser, it can erase almost anything.  It does that by being abrasive and essentially sanding the top layer of your paper away.  It may not be the solution to every mistake, but its usually worth trying to see if it will save your work.

So, without further ado… my masterpiece!

IMG_7902

Yeah, I need to work on my lighting…

What do you think?

Baby Announcement – Subway Art Style

Baby Announcement – Subway Art Style

One of my good friends had a baby a week or so ago.  We aren’t the kind of friends who really buy gifts, we end to make presents for different occasions.  I wanted a little something to give her when we met the new little guy, so I made a subway art type of birth announcement.  I printed a 5×7 and put it in a frame and also added 10 4×6 prints she could use to mail to family and friends, if she choses to.  I really like how it turned! Take a look!

announcement

I think I’m going to make a casserole for her too, what’s your favorite?

Mandala

Mandala

I wanted to give drawing mandalas a try.  Turns out, I’m not very good at making things even and the same size consistently.  So, instead of hand drawing them with a pencil and tracing in pen, I decided to use Illustrator.  I found a tutorial on how to make the basic set up and went from there.  The tutorial can be found here.  I think they turned out well for my first few tries!  I had fun “doodling” around with these, so I know I’ll be making more.

mandala copy

mandala

mandala2 copy

mandala2

I have some new Tombow Irotjten Colored Pencils that I am excited to color these with!

Enjoy!!

Gear Bag

Gear Bag

I don’t know if you know this, but I sew.  I haven’t shared much sewing because I’ve been paper crafting and hand lettering lately, but I do sew.  I went through a bag making phase where I made several different bags, lunch bags, tote bags and the one I’m going to share here, the bionic gear bag.  This bag has served several purposes since its creation.  First, it was for my son’s Beyblades and Beyblade parts, then it was for Pokemon cards, then it was my makeup organizer and now its for my hand lettering.  What I love about the Bionic Gear Bag is that its not too difficult to construct if you have a bit of sewing experience.  It has 4 zipper pockets as well as space between those zipper pockets to hold more stuff.  I easily fit all my Tombow Dual Brush Markers, MONO drawing pencils, calligraphy inks, nibs, nib holders, pencil sharpener, eraser, and extra ink pots for when they’re needed.  I have all that plus two zipper pockets are empty as well as one of the spaces between pockets.  Once unzipped, the front pocket area acts as a tray that would be a great spot to hold a jar of water and a blotting paper.

That blue container is holding my nibs for now.  They are all in there mixed together.  I plan to find a small beading container to keep them separated by type. I don’t have a huge collection just yet, so it can wait.
I think this is a great solution for me at this point because I am a beginner and don’t have quite the stash of hand lettering supplies a lot of the people I follow on social media have.  Though it would be great for travel, if you want to take just a small selection of supplies on a road trip, this is a great way to keep it all together, yet organized.

Since this one was laying around, it will work for now.  I think the next time I get out my sewing machine I’ll made a new one and add top handles so that I don’t have to be paranoid about ink spilling!  And make it out of more feminine fabric!